From my previous post about kombucha you could you found out what kombucha is, how it’s made and what are the potential benefits from drinking kombucha on the regular basis. In this post I will tell you how I make my kombucha, along with all my experiences from last six months of making it. I’m not an expert in that subject but I think I’ve made enough batches to provide you with a decent information.
As I’ve mentioned in my previous kombucha post I got my SCOBY from a lady I met on our community forum and she kindly gave me her spare one she grew for about a year. This SCOBY is still with me with new layers build up on top.

What is SCOBY?
Symbiotic culture of bacteria and yeast (SCOBY) is a culinary symbiotic fermentation culture (starter) consisting of lactic acid bacteria, acetic acid bacteria, and yeast which arises in the preparation of sour foods and beverages such as kombucha and kimchi. In its most common form, SCOBY is a gelatinous, cellulose-based biofilm found floating on the surface of the liquid. This bacterial cellulose mat is sometimes called a pellicle. SCOBY consists mostly of cellulose, which is a natural bi-product of kombucha fermentation. Cellulose is the same stuff that makes plant cell walls and veggie fibers. And I have to warn you here – if you are feeling disgust abut slimy, spongy stuff, at the beginning the look and the touch of SCOBY might make you feel a bit disgusted. But eventually you will get used to its peculiar texture and it won’t be bothered.
Does SCOBY expires?
As I said SCOBY I got was about one year old and looked completely fine. No traces of mould just just creamy-yellow coloured large disc immersed in weak tea coloured liquid. And from what I’ve read SCOBY has no expire date. As long as you keep it in a proper conditions and feed from time to time it can last for a really long time. Obviously with every new fermentation new SCOBY appears. You can build the up as I do or have multiple SCOBYs you can give to your friends and family.
If you’re interested in more informations about SCOBY and kombucha from more experienced brewers I found a great place you can find all you need to know about kombucha – brewbuch.com. I stepped upon this while writing this blog post and find it full of useful informations about kombucha in more details.
There will be again lots of information in this post before we get to the recipe, but it’s all very important so please bear with me – it will save you time and effort later on.
What you will need to brew kombucha?
Most of the ingredients and tools you probably already have at home. All you need to find is SCOBY. As I said mine was gifted to me but if I wouldn’t managed to find it near me I was going to order it online from the Scottish company that produces kombucha and also sells starter kits online. So you can either ask on Facebook or other online platform if anyone near you makes kombucha and have a spare one or look for online shops that sells it. Apart from that, the rest you’ll neet to brew your first kombucha, you will easily find in the shop.
To brew kombucha you will need:
- SCOBY in a starter liquid,
- tea – the best would be organic tea (teabags or loose leaf) of all sorts of tea: green, white, black, earl grey, lemon verbena, mate, rooibos,
- sugar – I use simple white sugar,
- water,
- large plastic spoon to remove the SCOBY from a jar if you don’t want to use your hand 😉
- large glass jar – 1 have 2 jars: 3 liters and 5 liters but you can start as small as 1 litre jar,
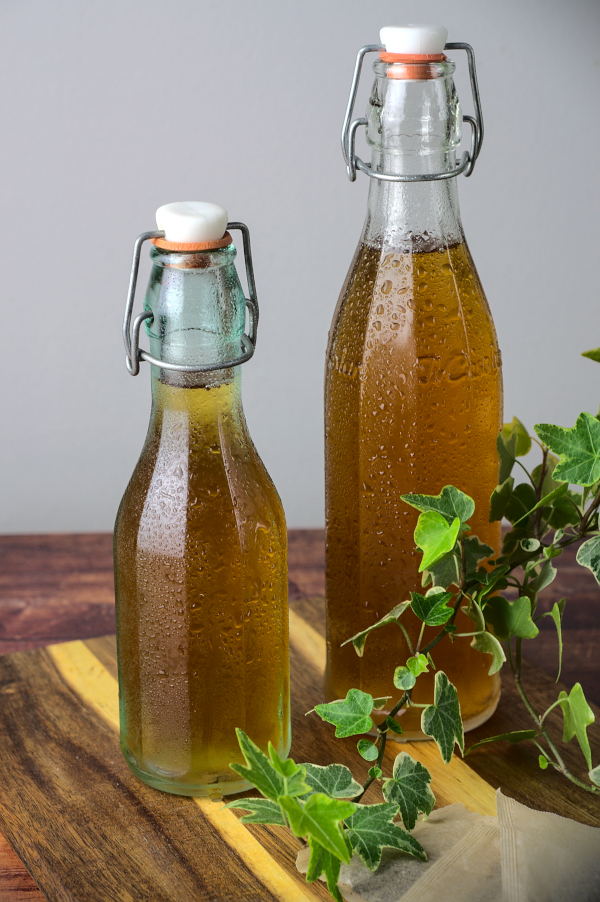
- bottles to store kombucha – I reuse bottles from olive oil (the type you can see on the photos) and glass bottles from tomato passata – all thoroughly washed and sanitised before used for kombucha,
- paper towels and elastic band to cover the jar.
What NOT to use to brew kombucha?
- metal tools: sieves, spoons, bottles, jars – SCOBY or kombucha should not get in contact with metal. You can use metal spoon or pot to brew the tea (I brew my tea in a large metal pot) but after you add SCOBY to your tea you should not use metal spoons or other metal tools, also ceramic jars or pots won’t be suitable. The best are glass jars,
- unwashed and unsterilised tolls and containers – always thoroughly wash all your tolls and containers in hot water and sanitise for example by boiling water. I washed all my bottles with dish washing liquid and filled up with boiling water to sanitise. Be careful doing that, always place the bottles in the sink and then pour in the boiling water in case of any of them fail and break,
- herbal and flavoured tea – most herbal teas are not suitable for brewing kombucha, as they don’t have the nutrients needed for fermentation. Also teas with artificial flavours or lots of spices won’t work well. Although I use earl grey tea that’s flavoured with bergamot oil and it works great – that’s one of our favourite kombucha.

Basic green tea kombucha recipe for 1 liter jar
INGREDIENTS:
- 1 SCOBY in starter liquid
- 3 teabags or 3 tsp of loose leaf green tea
- 50 g of sugar
- 1 litre glass jar
- paper towel and elastic band
DIRECTIONS
Boil 500ml of water, place your teabags in a pot (it’s handy if you have to brew a big batch) or a teapot (just make sure it’s perfectly clean). Let it brew for about 20 minutes. Remove the teabags and add sugar. Stir so that sugar dissolves completely. Let the tea cool down to the room temperature.
Pour the tea to the fermenting jar, pour over the SCOBY and starter liquid, more room temperature water if needed. Cover the jar with paper towel and secure with elastic band.
Allow the kombucha to ferment out of direct sunlight for 7-14 days, I keep mine in the kitchen pantry. The fermentation time will vary depending on the temperature, and how sweet or sour you like your kombucha. It gets sourer the longer you leave it.
Taste by moving the SCOBY aside and taking a little out with a clean plastic spoon. After some time, your tea may be slightly carbonated. When you like the taste, remove the SCOBY with a plastic (or other non metal) spoon. Save about 60mls of the kombucha as your starter for the next batch. I simply remove the SCOBY with a large plastic spoon, place it in the glass or plastic container and cover with leftover of kombucha from the bottom of the jar after I fill up all my bottles.
Fill up glass bottles with kombucha leaving some room on top for gases. Always store your kombucha in the fridge and consume within a week. You can store your SCOBY in a air tight container in the room temperature or in the fridge (I store mine in the fridge for couple days until I start new fermentation and it’s all fine).
All the things that can go wrong.
And now it’s time for all the bad stuff that might happen in the process, sometimes things can go wrong so it’s important to know what might be the reason. In my six months journey with making kombucha only once I had a problem with mould. Couple white mould spots appeared on top of SCOBY. So far never happened again.
- mould – green, white, blue or black spots on top of the liquid or SCOBY surface are bad. Usually everything that’s under the surface or in the liquid is OK. Like floating brown or yellowish “tentacles”. Mould need air to develop so it appears usually on the surface of your brew. If you see the mould unfortunately everything needs to go down the sink including SCOBY. Sanitise all your tools and containers and start from the beginning,
- temperature – perfect one would be about 25°C, but anywhere between 20-27°C will be OK. One of the most common mistakes is to prepare kombucha in an environment that is too cool or too warm. If the room temperature is too low, the fermentation process will be too slow and the drink will go bad. On the other hand, too high a temperature will disrupt the balance between yeast and bacteria, and the kombucha will lose its flavour,
- no ventilation – kombucha is made in the process of fermentation that needs air. It is therefore very important to ensure ventilation and a supply of fresh air. It will not be a good idea to put cover the jar with a lid or place it in a locked cupboard. I keep my one in the pantry but door are open most of the time. You can keep yours on the kitchen counter but make sure it’s out of the sunlight,
- you’ve added to little or no sugar – happened to me once to forget to add sugar but reflected quickly and fixed my mistake. Sugar is needed for yeast and bacteria to grow. reducing its amount will negatively affect the fermentation process. It is food for SCOBY, i.e. yeasts and bacteria present in kombucha, which without sugar will be much weaker or die. Replacing sugar with other sweeteners is not a good idea. SCOBY can be weakened considerably in this way. While such experiments are often successful, yeast and bacteria are degraded in the process, increasing the risk of mold growth,
- lack of hygiene – hygiene is one of the key elements of the tea mushroom fermentation process. Let’s make sure that all the dishes and the place where we put the jar are clean. Even slight contamination can cause mold growth. In terms of hygiene, we should be sure of the quality of the SCOBY we use. It is better not to use yeast and bacteria purchased from unreliable sources,
- always store your kombucha in the fridge – remember we don’t add any preservatives, there’s also no pasteurisation involved. Your kombucha is a living beverage that should be stored properly and consumed within a week,
- you’ve started fermentation and forgot about it – if you forget about you kombucha and brew it for too long, you can use it as a vinegar in: salad dressings and marinades, as a hair rinse to condition your hair and make it shine, as a facial toner or a cleaning product. Always make sure that kombucha has no mold. If you’re nut sure it’s better to waste it than take the risk of future problems.
Is it difficult and complicated to make kombucha?
Although at the beginning it sounds like complicated and difficult process that involves a lot of informations it’s quite simple and easy. If you read all the instructions, keep the hygiene and get into habit preparing your homemade kombucha will be as easy as 1-2-3. You also don’t need to stick to the recipe in 100%. If you add a little bit more of sugar or use stronger tea brew you will notice the difference in the taste. With time you’ll see what works the best for you, you room temperature and your taste. Because with different teas you will get different flavours of kombucha. I really like lemon verbena kombucha, my partner loves earl grey kombucha. I’ve also tried adding slices of ginger and turmeric to tea brew (always remember to remove it before fermentation) – also great idea. Although never tried second fermentation with fruits – if you’re interested in that you need to find more experienced kombucha brewers. I’ve also heard about coffee kombucha, haven’t tried yet though, but I’m very curious how it goes.
As you can see kombucha world is very wide and full of varieties, and I hope I encouraged you to at least try to start your kombucha journey 🙂


I love drinking kombucha. Another way to get a scoby is to simply buy some live kombucha from a grocery store and add a bit to your new tea. Community groups can often give you some, too. If you want a „cheats version” you can add a bit of bought kombucha to some apple juice or similar mixed with water and leave over night 🙂
LikeLike
Thanks for your comment. I’ve heard about using store bought kombucha as a starter, never tried to make it this way though. But it’s a good idea if someone doesn’t have an option to buy SCOBY. The only thing to remember – as you said it needs to be live kombucha, not pasteurised. Actually in my next post about kombucha I will be writing about differences between homemade kombucha and store bought one.
LikeLiked by 1 person
That will be interesting. They dont pasturise it in Australia but there are sometimes issues with alcohol content, as you need a license here to serve alcohol, and kombucha has it naturally.
LikeLike