I think cheesecakes are one of my favorite cakes (apart from meringue, it’s always first), they always have seem to be very difficult for me to make and when I started baking I avoided making cheesecakes. But as soon as I started and made quite a few I realized that they are not that scary as they seem. You just need to follow the recipe and couple simple steps when baking cheesecake. If you do, there’s no possibility that you’ll fail. And even if it fails there’s always a way to recover your cheesecake.
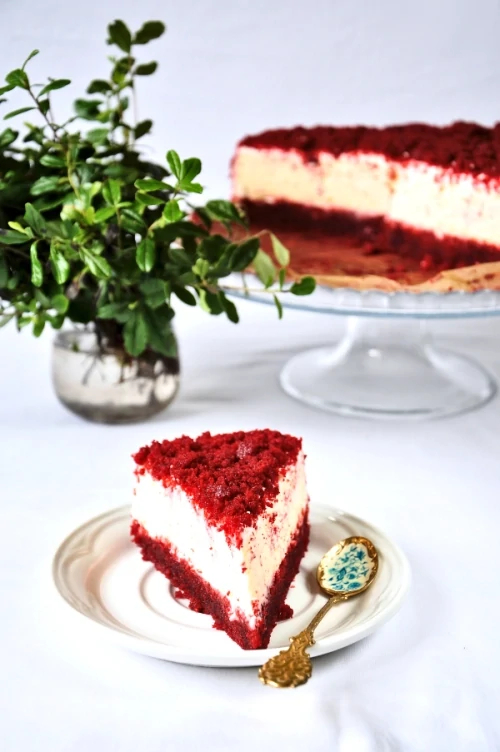
This red velvet cheesecake I made couple years ago for some family celebration. And as usual I made it for the first time ever, night before the celebration. When I started baking at 23.00 on Friday, I didn’t think that it would take me so long to make the cheesecake layer alone. The cheesecake baked for almost 2 hours! At times I was afraid that the oven had broken down because the cheesecake was still quite liquid – when I put it in, it looked exactly the same after an hour and a half. In a fit of desperation, I finally turned on the fan and then the cheesecake began to react and began to turn golden on the top. I know I shouldn’t do that – that is, open the oven and start the fan during baking, but believe me, I was afraid that I would be sitting in front of the oven until the morning. But I guess I didn’t hurt him with this dirty maneuver, because in the morning I found a nice, even cheesecake in the oven. On Saturday morning I baked a red velvet bottom, cooled it down quickly (hence it was not too high) and finished the cake. The cheesecake is light , extremely creamy and moist. Even if you’ll have to watch the baking for 2 hours, try it yourself, because the effect is great in my opinion.
Why I feel cheesecakes are so great?
They are very versatile, apart from using different types of cheese and baking method, If you have your base cheesecake recipe you can make plenty of different cheesecakes, adding fruits, chocolate, different toppings, making different base layers etc. Cheesecakes are moist, light and most of the times quite fluffy, although they need some time and effort.
So what are the tips and tricks to achieve a perfect cheesecake?
- cheese is important -the type of cheese you use is very important when baking cheesecake. Cheesecake is very popular in the country I come from (Poland), years ago our mums and grandmas were mincing curd cheese in meat mincers about 3 times, to achieve creamy cheese – perfect for cheesecakes. Now you can buy ready made, minced 3 times cheese for cheesecake. If you have somewhere around you a polish shop, you can look for big packs (usually 1kg) of cheesecake cheese. If not, probably depending of the country you have your own cheese, people usually use for cheesecakes. The most popular all around the world are probably: philadelphia, mascarpone, ricotta or quark. Using philadelphia, we get a very creamy and clammy cheesecake. A little bit salty taste, which may be not the tastiest for some people. Although I don’t mind this slightly salty taste, but it’s just my personal preference. Usually I use philadephia alternatives, which are the same consistency but more neutral in taste. You can also experiment and mix different types of cheese. Mascarpone is another story – it has a high fat content and whipped cream flavor. Also delicious but slightly different in taste and consistency,
- flour or not? – the flour thickens the structure of the cheesecake, and makes it less moist and light. If you add too much flour, it will make the cheesecake loose and crumbly. So, the choice is yours – if you want you can prepare cheesecake without – as I did in my keto cheesecake recipes. They will be more creamy and moist. And I love them this way,
- ingredients – cheesecakes requires quite a lot of eggs, they make the cheesecake rise and fluffy. The ingredients we use for baking should be at room temperature. The whipped egg whites bring a lot of air into the cheesecake. In the oven, air bubbles in the foam try to escape, which increases the volume of the cheesecake. But, unfortunately, because of that cheesecake may deflate. Cheesecakes always deflates more or less most of the times, so you need to deal with it. If you want your cheesecake to be flat and even, cheese, eggs, cream – should be taken out of the fridge at least 2 hours before baking. Also don’t whip the egg whites separately. Beat the whole eggs with cheese until the ingredients combine, using a medium speed. Do not spend too much time beating too much air will make the cheesecake rise during baking, and will collapse and crack as it cools down. If you want. to make cheesecake extra fluffy, you can beat the egg whites separately and add them when the rest of ingredients are combined.
- two methods of baking – as all the cakes, just pop the cheesecake into the oven – cheesecake may rise unevenly or crack, which in my opinion also looks beautiful, but depending of your needs – if you want to decorate the cheesecake for example, you might want it to be rather even and flat. For this purpose you can bake it in water bath – you simply put a pan with boiling water into the over, and you place the baking tray in the pan (covering the baking trey with baking paper or aluminum foil so water won’t get into your cheesecake) or over it on the separate shelf. Thanks to the water that evaporates during baking, cheesecake rises evenly and won’t crack. It’s also really moist,
- baking – maximum temperature should be 180ºC, with top and bottom heater and no fan. But I’ve made couple cheesecakes in different ovens, and it usually works with different set ups (top heater and fan, top and bottom heater and fan), you just need to adjust the temperature and time to your own oven – it will need a little bit of time and practice. Usually I lower the heat to 140-150ºC and extend the time – there’s better chance that cheesecake won’t crack , and get to brown on top. If it does, or you know that your oven burn the cakes on top, place a piece of aluminum foil on top. Don’t open the oven during baking if it’s not really necessary. Also after baking leave it to cool down in the oven for about 1-2 hours and slightly open the door. Do not overbake – edges will get burn and dry.
OK, I know it looks like really complicated now, but believe me, if you try couple times you’ll get into practice and even if it’s not going to be perfect (and my cakes are never perfect), there’s nothing better than homemade cheesecake. This cheesecake is very creamy and moist and thanks to added flour is a little bit more stable and makes a clear difference between cheesecake and buttercream. If you like Christmas sugar decorations, you can place them on top for even more festive charm. I’m not a fan of using chemicals in cakes but in case of Christmas and this cheesecake I’m making an exception. I think Christmas holidays are a great occasion to make something special like this cheesecake.

red velvet cheesecake
NOTE: my measuring cup is 250ml regular glass
INGREDIENTS for cheesecake (baking tray 26cm/10 inch):
- 1 kg cheese for cheesecake (I used special polish one)
- ½ cup caster sugar or sugar alternative
- 3 large eggs
- ¾ cup sour cream
- 1½ tbsp plain flour
DIRECTIONS
All ingredients should be at room temperature (which of course I forgot). Beat all ingredients together until combine using handheld mixer. Line baking tray with baking paper. Pour the cheesecake into the baking tray and a few times from a low height drop it on the kitchen counter to get rid of excessive amount of air bubbles. Preheat the oven to 150°C, put a heatproof dish filled with warm water on the lowest shelf. The cheesecake baked at this temperature for almost 2 hours, while for the last 15-20 minutes I turned on the fan, because I was afraid that it would never bake. Only when the fan was turned on did something start to happen. I baked until the top grew slightly golden and toothpick came out dry. After turning off the oven, I left it for another 10 minutes, and then I opened the door. I left it in the oven until it was completely cool, then placed it in the fridge. The cheesecake came out very even.
INGREDIENTS for red velvet layer:
- 1¼ cup plain flour
- ½ cup caster sugar
- ½ tbsp cacao
- pinch of salt
- 1 large egg
- ¾ cup vegetable oil
- ½ cup kefir, buttermilk or natural jogurt
- 1 tsp vanilla extract
- ½ tbsp vinegar
- ½ tsp baking soda
- 2 tsp powdered red food dye
Combine all the dry ingredients (except baking soda and red dye!). And in a separate bowl, all the wet ingredients (except vinegar!). Add dye, give it a good stir. Add wet ingredients to the dry ingredients and mixed everything with a fork – in one direction only. Place a piece of baking paper on the bottom of the baking tray. Grease the sides with oil. Heat the oven to 180°C. It’s very important that the oven is hot when cake batter will be ready. So switch on the oven in advance. Then quickly mix the vinegar with baking soda and pour this foamy liquid into the batter. Mix with a fork, put it into a baking tray and put it into a hot oven. I’ve been baking for about 35 minutes. However, too soon after baking, I opened the oven (time was chasing me) and the cake deflated a bit. But that’s fine, keep going.
INGREDIENTS for buttercream:
- 250g mascarpone
- 125g soft butter
- 1 cup icing sugar or sugar alternative
- hint of vanilla extract
Beat butter (this time I remembered to take it out earlier) with handheld mixer until light and fluffy, then add powdered sugar and vanilla, beat again, and finally add mascarpone and beat until combine and creamy. The only thing left is to layer the cake and decorate. Cut off the top layer of the dough with a sharp knife, and crumble it into the bowl. Spread a layer of buttercream on red velvet and turned it upside down putting it on top of the cheesecake. Then gently turn it upside down. I decided that this way it would be safer for cheesecake, which could break when transferred to the cake. Cover the sides and the top with buttercream and sprinkle the top and sides with red velvet crumbles. Finally, place cheesecake in the fridge. It tastes best when fresh the layers start to separate and the cheese layer starts to crumble. Store it it in the fridge for up to 3 days, ideally in a airtight container so it doesn’t catch the smells from the fridge.

Pingback: new york cheesecake